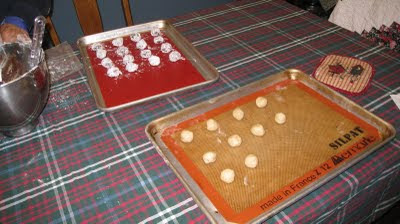
It is December 6th and twelve kinds of cookies are made and packed away – we are about halfway through the Christmas Cookie Marathon. This is a special time in my kitchen shared with my husband. Though it is normally not his territory, he has honed his skills as dough-roller-outer extraordinaire. With Christmas tunes in the  background and flour in the air, I’m a happy camper. It is a time to relax and work and share some laughter after a busy fall at the inn. And, since many of my cookies must be packed and shipped by December 15, we start baking the weekend after Thanksgiving.
I don’t know what it is about food, but some of my earliest memories are in the kitchen, helping Mom. Most center on the holidays – with the bustle of preparations for large crowds and the excitement of the coming gathering. She was always patient with me – for I was not, and probably will never be, a “tidy” cook or baker. We had an extensive family and, with three brothers, there was no meal too big, no desserts too rich, and certainly no such thing as too many cookies. 
Ah, yes, the cookies – this yearly tradition of making cookies at Christmastime started a long time ago…
I always loved to give home-made gifts – sometimes it was crafts, sometimes chocolates (when I was in high school I enrolled my boyfriend and myself in a chocolate-making course). I was never sure if he was all that interested in the chocolate, but we had a lot of fun and he liked to eat the creations. Over time, I settled on just giving cookies every Christmas. I would stay up late many nights and lug in big platters of cookies to every job I ever had. It became my “thing” to do for the holidays.
Soon friends were sharing their family favorites. Over the years, I’ve compiled my tried-and-true recipes, but I always like to add a new cookie just to keep it interesting.
Two years ago I decided to try my hand at making marshmallows. Gourmet printed a recipe for Toasted-Coconut Marshmallow Squares – this seemed the perfect little stocking stuffer gift for my Mom – a real marshmallow lover.
I’ve adjusted the recipe slightly – doubling the amount of coconut. You’ll see why later.
I think this would be a great recipe to make with kids – especially the final process. This year I made the recipe with my mom. She pronounced it too “fussy” but I think it’s fun, and there’s no denying that these are not the boring white cubes that arrive in those plastic bags. You will need a candy thermometer and will have best results if you make these on a dry day.
Toasted-Coconut Marshmallow Squares
4 cups unsweetened dried coconut
3 (3/4 oz) envelopes unflavored gelatin
1 cup water, divided
1 ½ cups sugar
1 cup light corn syrup
¼ teaspoon salt
2 teaspoons pure vanilla extract
½ teaspoon coconut extract
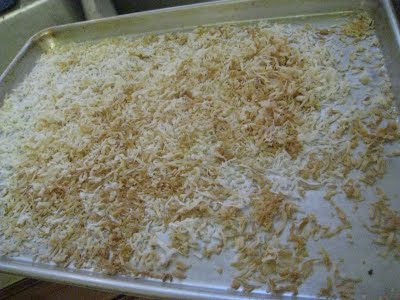
Preheat oven to 350 and toast coconut in baking pan until golden – about 7 minutes. You’ll want to stir it frequently – it tends to brown around the edges first.
Spray a 9-inch baking pan or use a silicone one. I like the silicone – you can bend it to get the squares out. Sprinkle with ½ cup toasted coconut.
Sprinkle gelatin over ½ up cold water in mixer bowl – mix a little and let sit while you make the syrup.
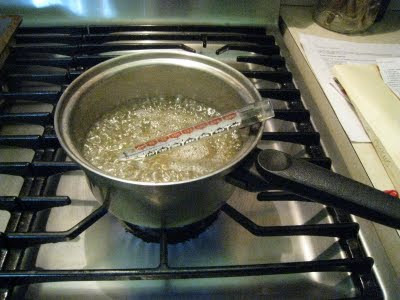
Heat sugar, corn syrup, salt and remaining ½ cup water in a small heavy saucepan over low heat, stirring until sugar has dissolved. Bring to a boil over medium heat without stirring, washing any sugar crystals down the side of the pan with a pastry brush dipped in cold water. Ok, I don’t do the pastry brush thing – I just boil it. Put the thermometer in and boil until it registers 240. Remove pan from the heat and let stand until the bubbles dissipate.
This is when the recipe turns into a science experiment. With mixer at low speed, pour hot syrup into gelatin in a thin stream down the side of the bowl, increase speed to high and beat until very thick – about 15 minutes. Add vanilla and coconut extracts and beat 1 minute more.

Spoon marshmallows over toasted coconut in baking pan and press evenly with dampened fingertip to smooth top, then sprinkle with ½ cup toasted coconut and press in – I find that wearing food-grade gloves helps.
Let stand for 2 hours or until firm. This is a good time to get the kids – they’ll like this part.
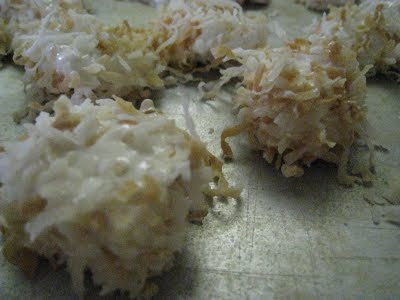
Run a sharp knife around the edge of the pan and cut into the tiniest pieces you can. Put remaining toasted coconut in a bowl. Dredge the pieces in the coconut and watch them grow. This is why you want the pieces really tiny lest they become the blob that ate Lancaster County. The first year I could not believe that a small 9 x 9 pan would yield enough marshmallows for everyone in Terre Hill.
Even if you don’t like marshmallow, you owe it to yourself to try a small square. These are really heavenly.
Enjoy.

